Setup Guide

Set up Engage as a destination in RudderStack.

This guide will help you set up Engage as a destination in the RudderStack dashboard. It also lists the configuration settings required to correctly send data from the supported sources to Engage.

Connection compatibility

Destination info
  • Status: Generally Available
  • Supported sources: Android, iOS , Web, Unity, AMP , Cloud, Warehouse, React Native , Flutter, Cordova, Shopify
  • Refer to it as ENGAGE in the Integrations object.

Connection modes
SourceCloud modeDevice modeHybrid mode
AMPsupportednot supportednot supported
Androidsupportednot supportednot supported
Cloudsupportednot supportednot supported
Cordovasupportednot supportednot supported
Fluttersupportednot supportednot supported
iOSsupportednot supportednot supported
React Nativesupportednot supportednot supported
Shopifysupportednot supportednot supported
Unitysupportednot supportednot supported
Warehousesupportednot supportednot supported
Websupportedsupportednot supported
Supported message types
SourceIdentifyPageTrackScreenGroupAlias
Cloud mode
Supported sourcessupportedsupportedsupportednot supportedsupportednot supported
Device mode
Websupportedsupportedsupportednot supportednot supportednot supported

Get started

Once you have confirmed that the source platform supports sending events to Engage, follow these steps:

  1. From your RudderStack dashboard, add the source. Then, from the list of destinations, select Engage.
  2. Assign a name to your destination and click Continue.

Connection settings

To successfully set up Engage as a destination, you need to configure the following settings:

  • Public Key: Enter your Engage public key. For more information on obtaining your Engage public key, refer to the FAQ section below.
  • Private Key: Enter your Engage private key here. This key is required for deleting a user or updating their email in Engage.
  • List IDs: Enter your Engage list ID. You can get it by logging into your Engage dashboard and going to Lists > clicking your list > Subscription and Settings > Your list ID.
  • Client-side Events Filtering: This setting lets you specify which events should be blocked or allowed to flow through to Engage. For more information on this setting, refer to the Client-side Events Filtering guide.
  • Use device mode to send events: Enable this setting to send your events to Engage via web device mode.

FAQ

Where can I find the Engage Public Key and Private Key?

To get your Engage public key and private key, follow these steps:

  1. Log into your Engage dashboard.
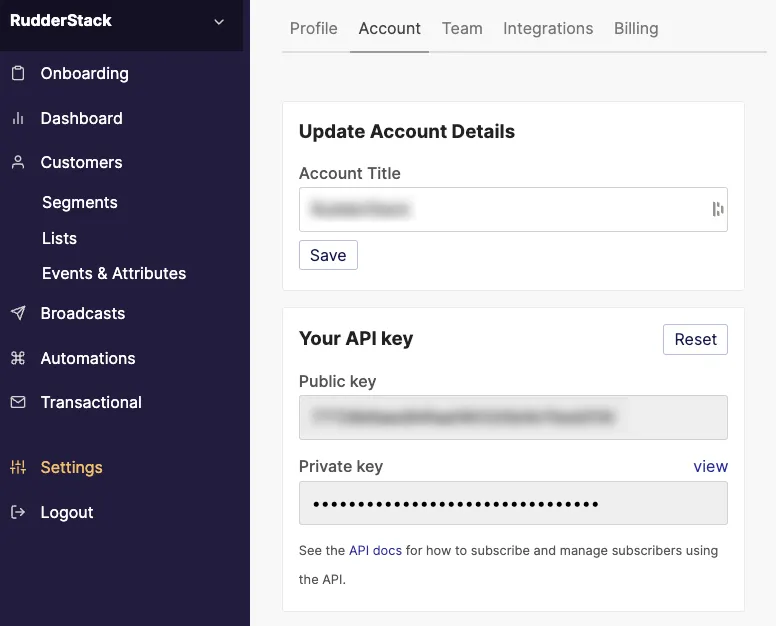
  2. Navigate to Settings > Account > Your API Key:
Public and Private Key in Engage dashboard

Questions? Contact us by email or on Slack