Connect Reverse ETL Source to Zoho

Configure a Reverse ETL source with your Zoho destination.

This guide takes you through the steps to connect a Reverse ETL source to the Zoho destination.

warning
RudderStack currently supports this integration only for the US region.

Set up connection

warning

The Reverse ETL feature supports only source-driven pipeline configuration.

Make sure you have set up a RETL source and connected it to your Zoho destination before following the below steps.

  1. Confirm the connection settings for Zoho destination and click Continue.
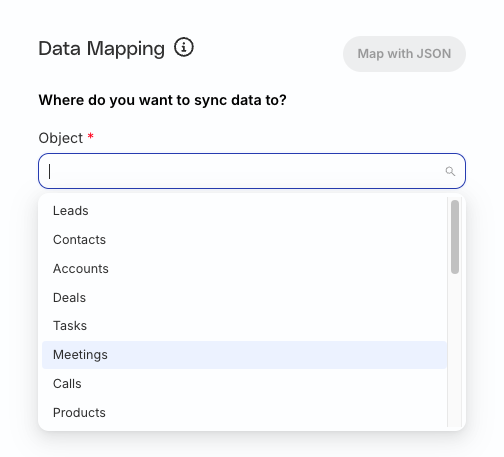
  2. In the Where do you want to sync data to? section, select the Object from the dropdown.
  1. Set the Sync mode to specify how RudderStack should sync the data to Zoho.
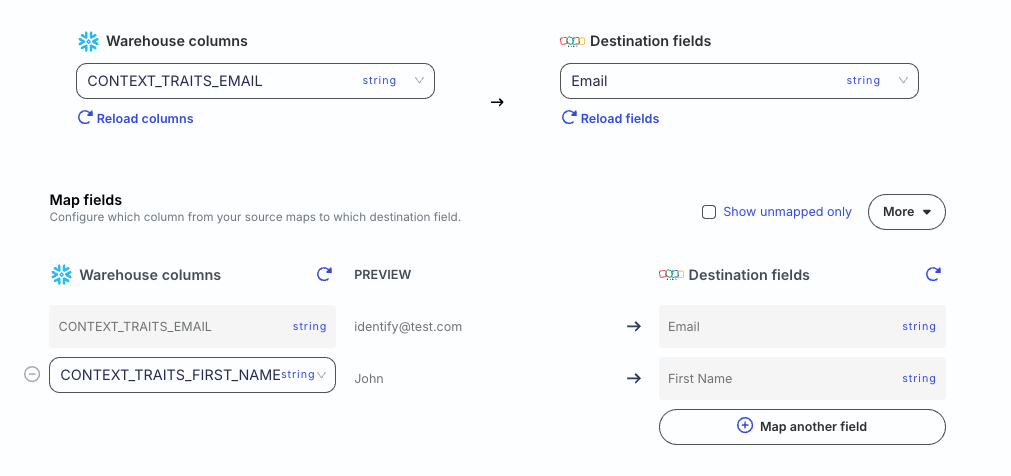
  2. In Choose identifier, specify the warehouse column that RudderStack uses to identify your records.
  3. Map your warehouse columns to specific Zoho fields using the Map fields setting.
info
Only the searchable fields of a module are visible under the Destination fields. Refer FAQ for more information on making the module fields searchable.

Supported APIs

RudderStack uses the following Zoho APIs to sync data from your Reverse ETL sources:

Next steps

FAQ

Why can’t I add a Reverse ETL source from the destination page?

The Reverse ETL feature supports only source-driven pipeline configuration. It means that you must configure a Reverse ETL source in RudderStack and then connect it to a new or existing destination. Note that this destination should not be connected to any other source.

See Reverse ETL FAQ for more information.

Why am I getting an “INVALID_QUERY, the field is not available for search” error while deleting my records?

You can encounter this error if the OAuth account used for authentication does not have the required read-write permissions for the particular custom field you are trying to delete. To verify:

  1. Log in to your Zoho CRM account.
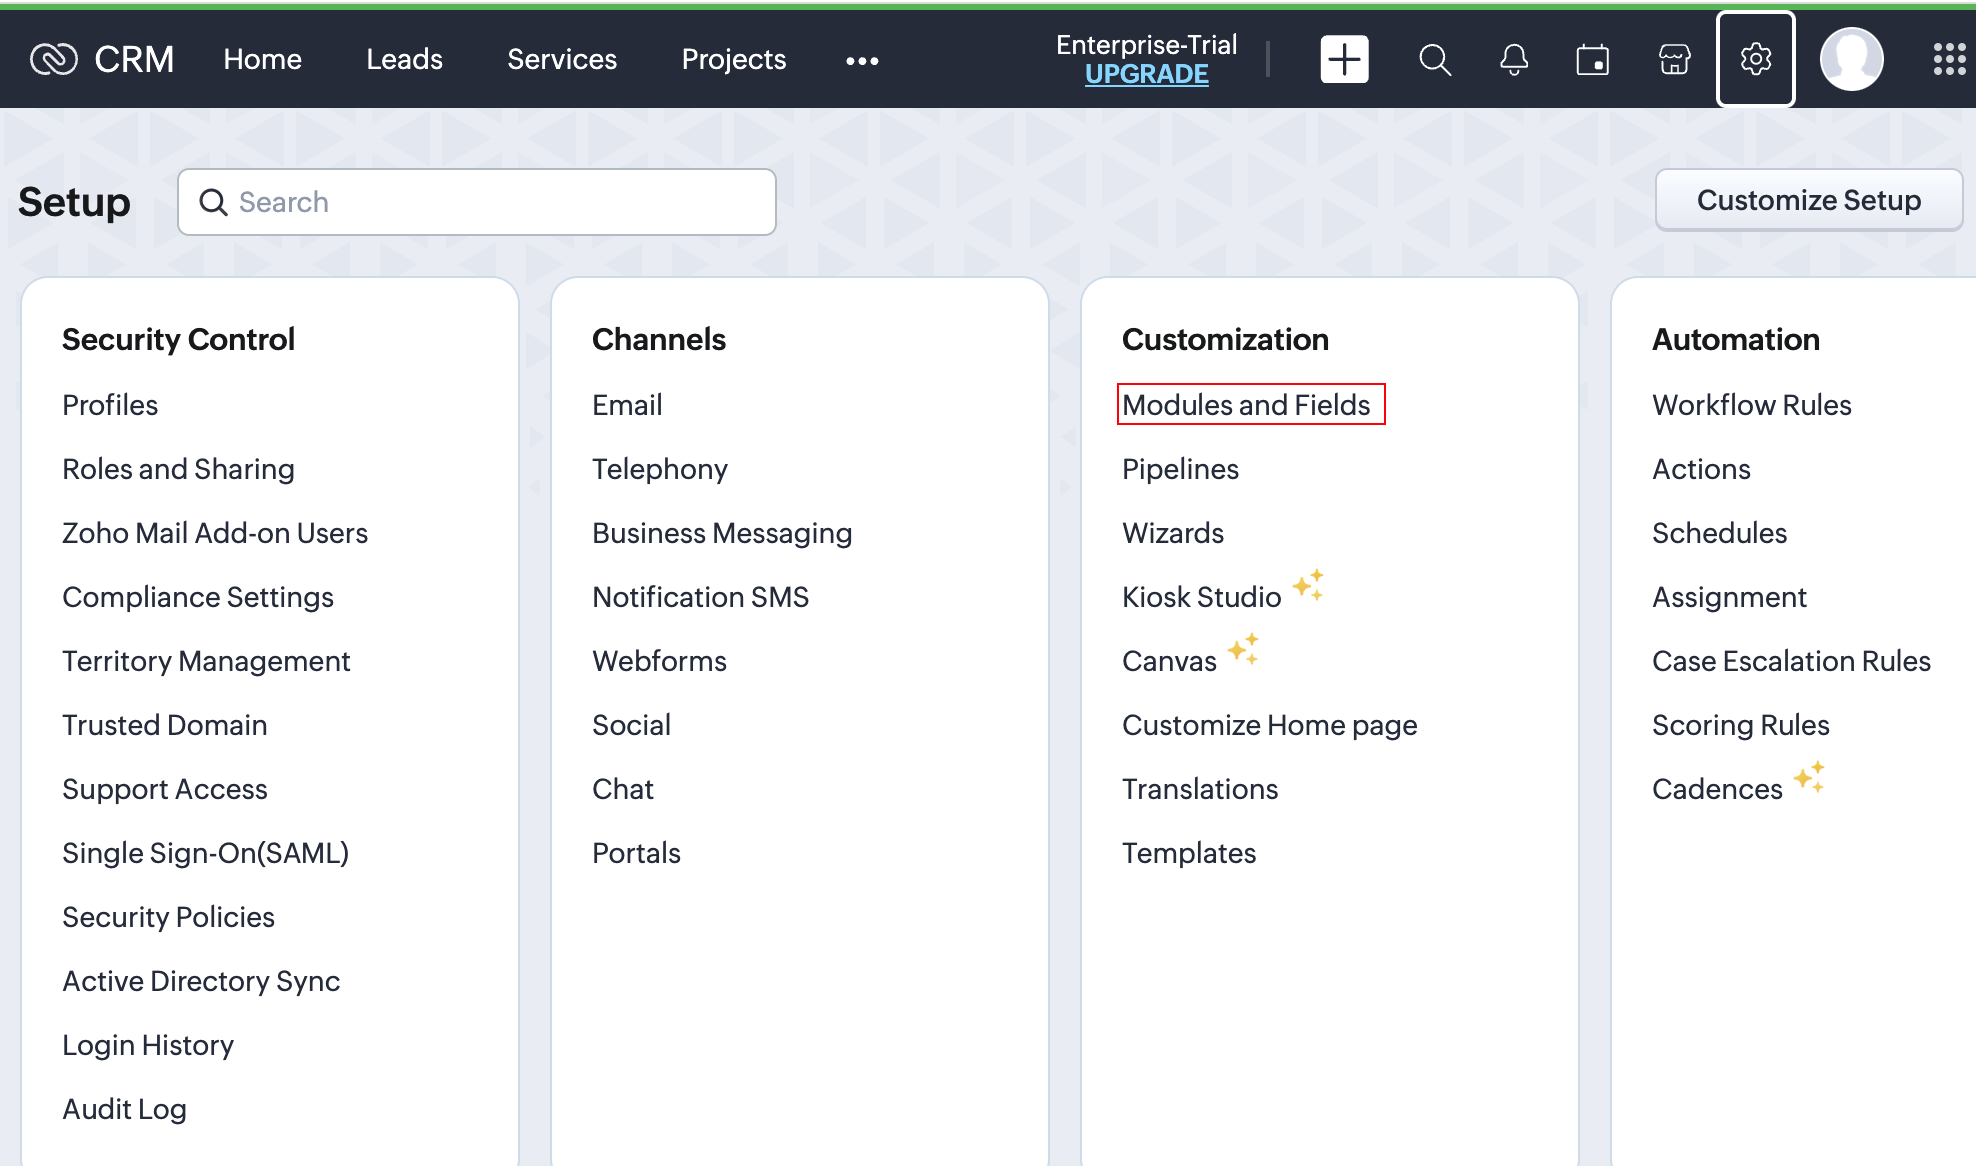
  2. Click Setup > Modules and fields.
  3. Select the required module and click the Fields tab.
  4. Click Field permissions.
  5. Choose Read and Write for that particular field and click Save.


Questions? Contact us by email or on Slack